
Welcome back! Only one person got the haddock so far. If you don't know what I am talking about then you haven't been paying attention!
This post I am going over April 22nd's progress.
Decided to get a grip on the speakers. To move forward I needed to know exactly what was going into the bottom of the case and the only unknown variable was the speaker's guts. So I needed to spill those guts!

Precision hacksawing. Nothing could possibly go wrong.

Trying to free the control/volume board from the plastic housing. Cutting plastic with a hacksaw is messy. Ignore the skinny legs, they cannot be real.

And it's free! Perfect.

Perfectish? I didn't realise that hidden inside the plastic housing was a knot of the cable I was trying to free. Turned out this was the line in cable and I would be shortening it a lot anyway. No problem.

This speaker contains the power supply. Instead of building a housing for it I decided to keep it in this casing and screw it to the base of the cabinet face down.

Kind of like this. Dropped a four-way power strip in there to get a feel of the space I would have. It ended up a lot less than this!

Cut out a grid of dots in a roughly circular pattern. Taped it to where I wanted the speakers to be mounted and grabbed a drill. In wonderful hindsight this would be a hell of a lot easier on a drill press. A lot neater too.

Tiny pilot holes first.

Then a little bigger.

Then the only drill I had that was the right size for the final hole was this pilot drill from a hole saw set. It had a really aggressive rake on the cutting edge and made a massive mess of the holes.

I ploughed on regardless. It isn't a visible feature so I was not worried. And I planned to cover it with a 3d printed speaker grill if it was a total disaster.

Looks like 3d printing speaker grills was in my future!

Cleaned up and sanded flat it looked better.

And then, with a coat of paint, I was happy to leave it like this. This is one of those things I would have spent more time or money on if either was something I had more of.

Cut some battens for the speakers to sit on. The drivers need space to work, if they are screwed flat to the wood they cant move and would not sound good.
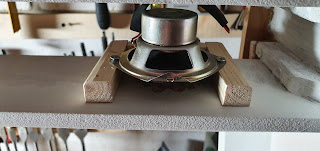
Stereo!

Added a small block to hold them down for when I came to glue them in place. Note I had painted the inside of the marquee white. This was in case I ended up going with a backlit, transparent marquee. Would make the lighting brighter and more even.

And that's all for that day.
Coming up! Jigsawing, hacksawing, drilling, and a mystery nail!
No comments:
Post a Comment